Introduction to Japanese Katsu Bowls
Why Katsu Bowls Are a Must-Try at Home
If you’ve wandered into a cozy Japanese eatery, chances are you’ve come across the delightful katsu bowl. This dish combines tender, crispy-fried meat (think beef cooked to perfection) with fluffy rice and savory sauce, transforming a simple meal into an unforgettable experience. But why not immerse yourself in this culinary adventure at home?
The Allure of Japanese Katsu Bowls
Japanese katsu bowls are more than just a comforting meal; they invite creativity and personalization in the kitchen. One of the great things about them is that they’re versatile. You can use different proteins such as turkey bacon or even chicken ham, adapting the dish to your taste preferences or dietary needs. Plus, they’re quickly cooked, making them a fantastic option for busy weeknights.
Homemade Touch
When you make katsu bowls at home, you have full control over the ingredients and flavors. You can choose the level of crunchiness, the type of sauce, and the freshness of the toppings. Don’t forget about the joy of adding your favorite vegetables—like steamed broccoli or sliced avocado—and making it a vibrant and colorful dish.
Healthier Alternatives
If you’re health-conscious, opting for a homemade version means you can make it healthier! Swap out the traditional breading for panko breadcrumbs, which offer a lighter crunch, and use lean cuts of beef or opt for turkey bacon instead of conventional meat. You can even create a low-carb or gluten-free version by using cauliflower rice and gluten-free breadcrumbs.
Quick and Easy Recipes
Getting started with these bowls is simpler than you might think! Most components can be prepped ahead of time, and with only a few key ingredients, you will create a delicious meal in under 30 minutes. Feel like experimenting? Check out sources like Just One Cookbook for more katsu inspirations and tips.
By embracing the world of Japanese katsu bowls, you’re not just making a meal; you’re creating a delightful experience that pairs well with friends, family, or a cozy night in. Dive into the deliciousness, and you might find it hard to go back to takeout!

Ingredients for Japanese Katsu Bowls
Creating delicious Japanese katsu bowls starts with the right ingredients. What makes this dish so appealing is its balance of flavors and textures, perfect for a cozy meal at home. Here’s what you’ll need:
Protein Options
- Beef cutlet: Opt for tender cuts like sirloin or tenderloin for a juicy experience.
- Turkey bacon: A great alternative for a flavorful crunch if you’re looking to add some smokiness.
- Chicken ham: Gives a unique taste while keeping it light and satisfying.
Base Ingredients
- Panko breadcrumbs: These Japanese-style breadcrumbs will give your katsu that signature crispy texture.
- Japanese rice: Short-grain rice is preferred for a sticky and comforting base.
Toppings and Sauces
- Tonkatsu sauce: This sweet and tangy sauce is a must for drizzling over your katsu.
- Green onions and sesame seeds: Fresh herbs and seeds add the final touch of flavor and crunch.
If you’re interested in learning more about the ingredients, check out sources like Serious Eats or Just One Cookbook for deeper insights on authentic Japanese cooking techniques. By assembling these items, you’re well on your way to crafting a dish that captures the heart of Japanese cuisine!
Step-by-Step Preparation of Japanese Katsu Bowls
Japanese katsu bowls are a delightful culinary adventure that brings a taste of Japan right to your home. With succulent, crispy meat, fluffy rice, and a drizzle of savory sauce, it’s no wonder these bowls are becoming popular among young professionals looking to whip up a satisfying meal. Let’s dive into the preparation steps to create your own delicious Japanese katsu bowls.
Prepare the Rice
The foundation of any great katsu bowl is, of course, rice! Start by selecting a high-quality short-grain rice, such as sushi rice, to achieve that perfect sticky texture. Here’s how to prepare it:
- Rinse 1 cup of rice under cold running water until the water runs clear. This removes excess starch and helps the rice cook evenly.
- Cook the rice using a rice cooker or the stovetop method. If you’re using a stovetop, combine the rinsed rice with 1.2 cups of water and a pinch of salt. Bring it to a boil, then reduce the heat to low, cover, and simmer for about 18-20 minutes.
- Once cooked, let the rice sit covered for an additional 10 minutes to steam. Fluff it with a fork before serving.
For added flavor, consider including a small piece of kombu (dried seaweed) in the cooking water. It will impart a lovely umami flavor! If you’d like more tips on cooking rice perfectly, check out serious eats.
Prep the Chicken (or Beef)
Now that your rice is on its way to fluffy perfection, it’s time to focus on the star of the dish: the meat. For a classic flavor, you can use chicken or beef:
- For chicken katsu, take 2 boneless, skinless chicken breasts. If you prefer beef, use 2 thinly sliced beef cutlets.
- Tenderize the meat by gently pounding it with a meat mallet, being careful not to tear the meat. Aim for a thickness of about 1/2 inch to ensure even cooking.
- Season both sides with salt and pepper to taste.
This is the perfect time to reflect on your flavor preferences. Do you like things a little spicy? Consider sprinkling a pinch of cayenne pepper for an extra kick!
Set Up Your Breading Station
A successful katsu depends on a well-organized breading station. Here’s what you’ll need:
- Flour: 1 cup of all-purpose flour.
- Eggs: 2 large eggs, beaten.
- Panko breadcrumbs: 1 cup. These Japanese breadcrumbs yield a delightful crunch.
Set it up in order: flour, eggs, and panko in separate shallow dishes. Dredge each piece of meat first in the flour, making sure to coat it completely. Next, dip it in the beaten eggs, allowing the excess to drip off, and finally, coat it with panko breadcrumbs. Press the breadcrumbs onto the meat to ensure they stick well.
Fry the Katsu to Golden Perfection
Heat up a generous amount of oil (about 1/2 inch deep) in a large skillet over medium heat. You want the oil hot enough so that a breadcrumb sizzles when dropped in. Here’s how to fry your katsu:
- Carefully place the breaded chicken or beef into the hot oil without overcrowding the pan.
- Fry each side for about 3-4 minutes or until they’re golden brown and crispy. Don’t rush this step! Proper frying will yield the best texture.
- Once done, transfer them to a paper towel-lined plate to drain any excess oil.
If you’re looking for an air fryer alternative, many recipes are available online for healthier options!
Mix the Katsu Sauce
No katsu bowl is complete without a flavorful katsu sauce. Here’s a simple recipe:
- In a bowl, combine 2 tablespoons of ketchup, 1 tablespoon of Worcestershire sauce, and 1 tablespoon of soy sauce. Mix them well to create a delightful glaze that beautifully complements the crispy meat.
Feel free to adjust the ingredients based on your taste. A splash of chili sauce can add a nice punch if you’re feeling adventurous!
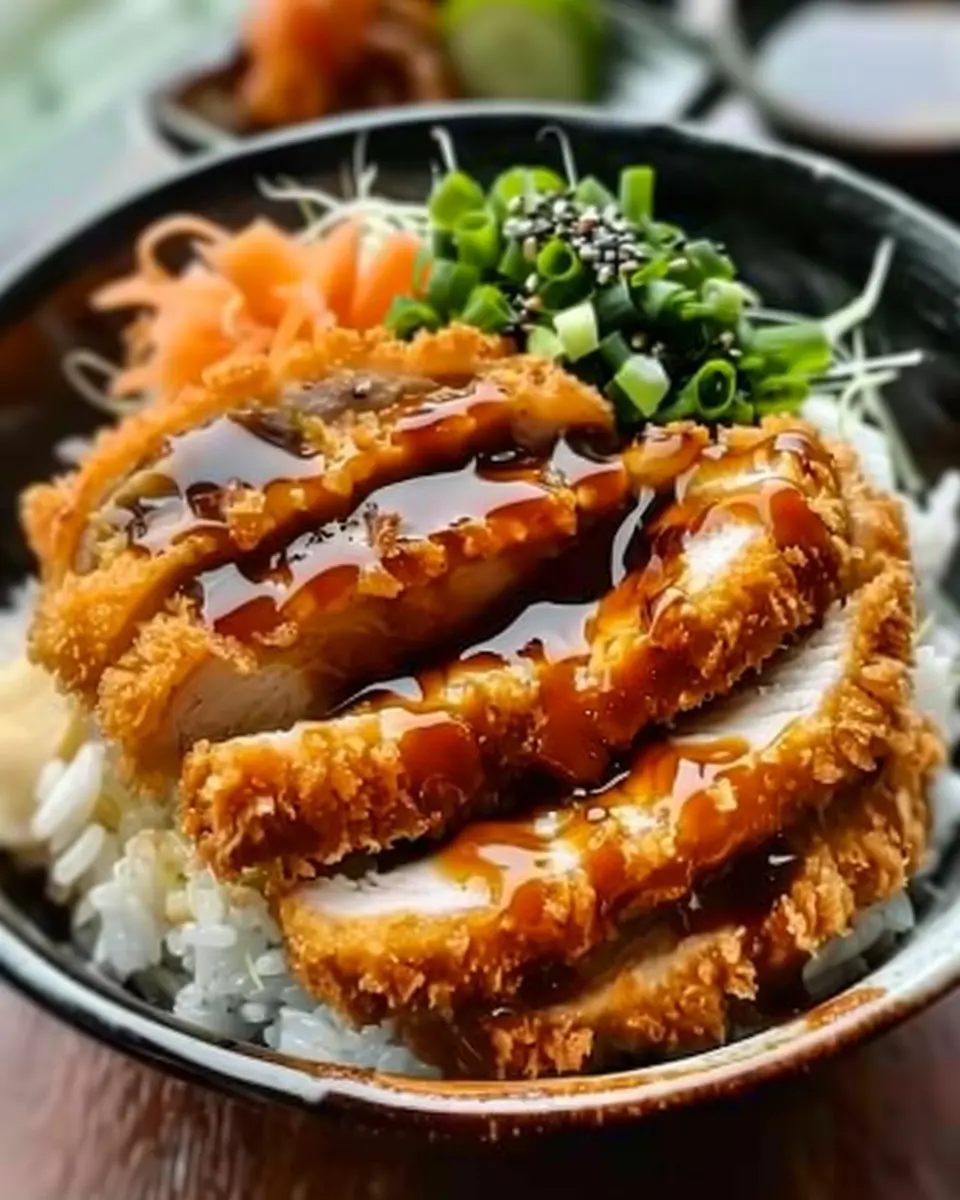
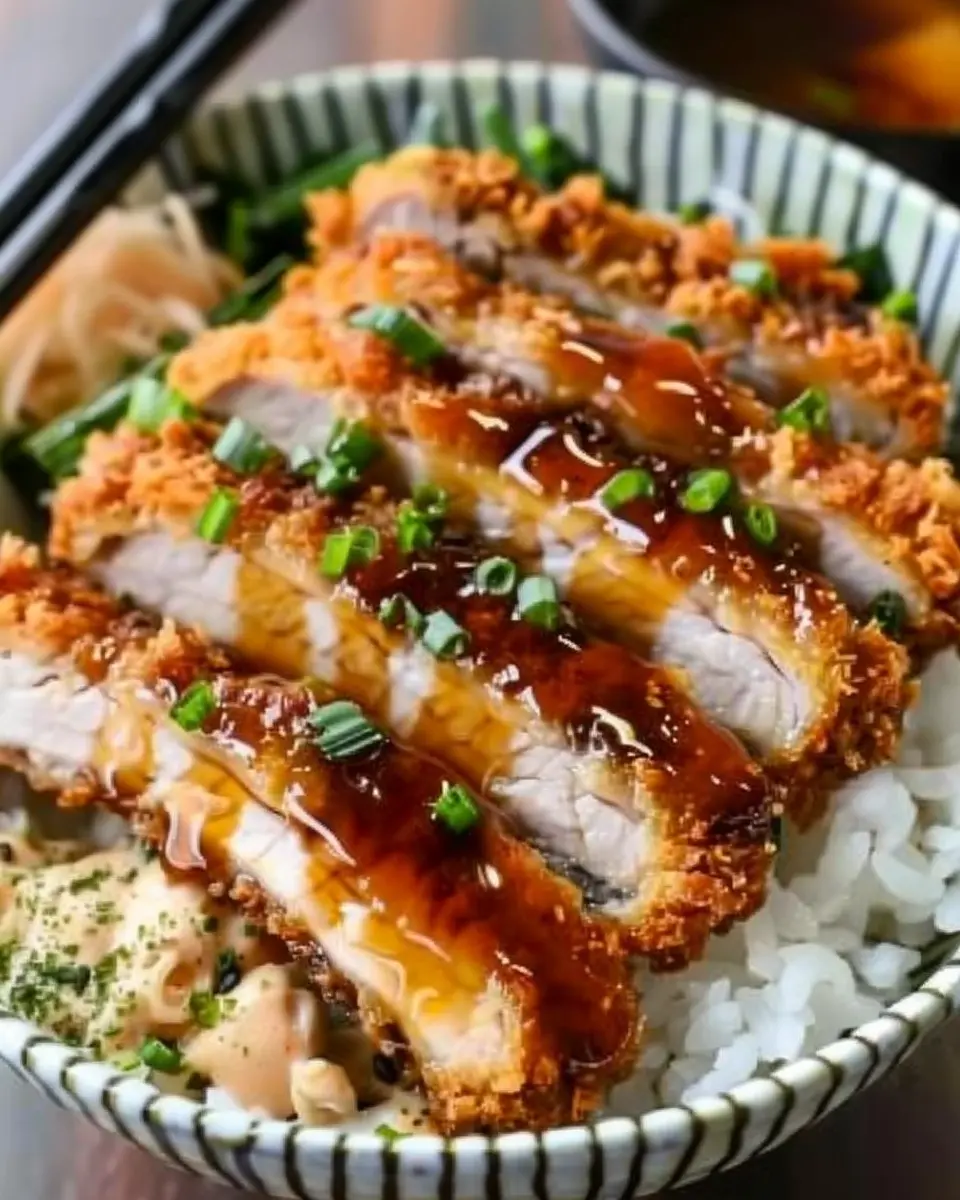
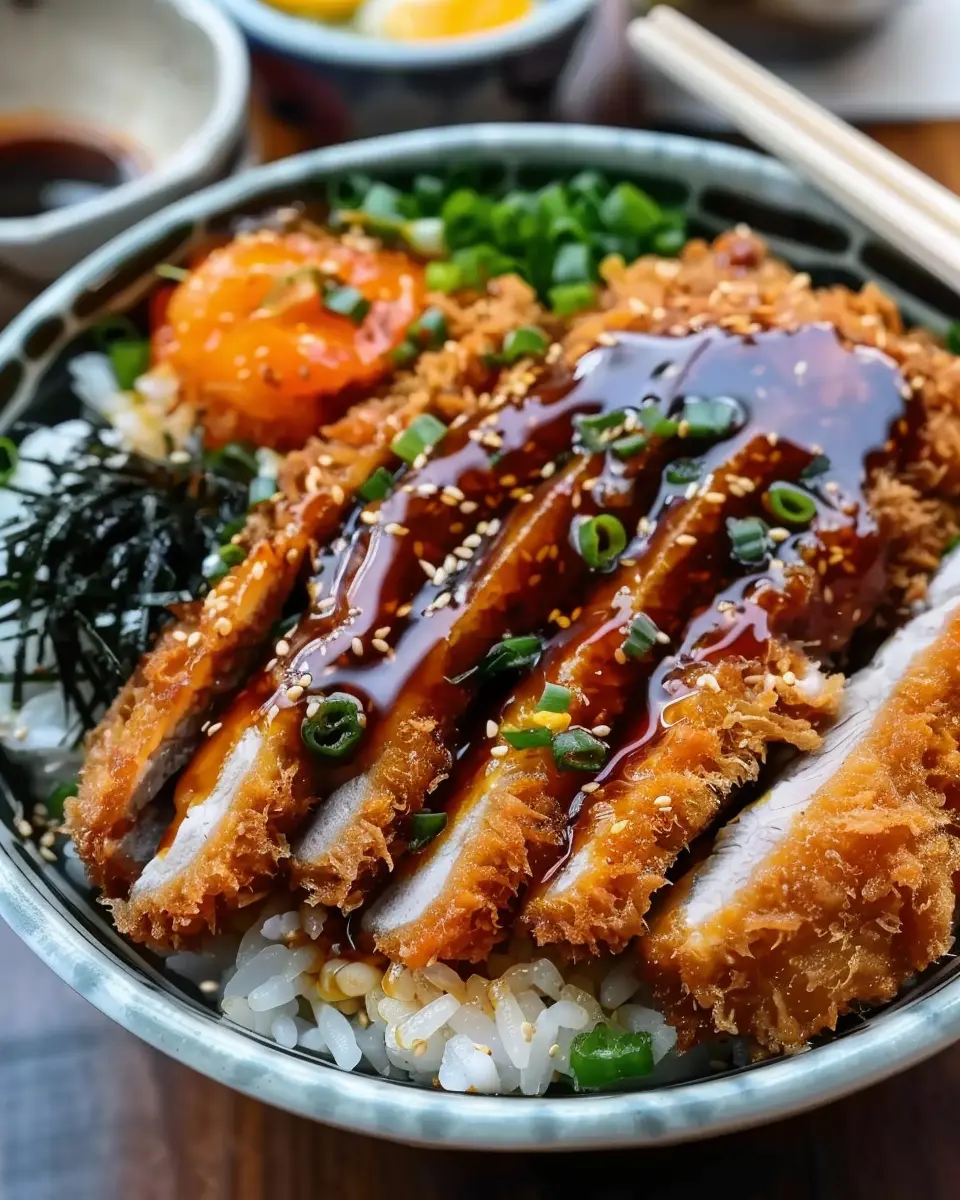
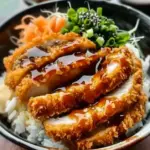
Assemble Your Katsu Bowl
Now comes the fun part—assembling your Japanese katsu bowls! Here’s how:
- Start with a generous scoop of rice at the bottom.
- Slice your katsu into strips and arrange it aesthetically on top.
- Drizzle the katsu sauce over the meat, and add any additional toppings, such as shredded cabbage, pickled ginger, or even a runny fried egg for richness.
Enjoy this process; it’s where your art meets your appetite! Don’t forget to share your creations on social media—everyone deserves to see your culinary triumph!
By following these steps, you’ll have yourself a comforting, satisfying bowl of Japanese katsu. Whether for a weeknight dinner or a casual gathering, this dish is sure to impress!
Variations on Japanese Katsu Bowls
Vegetarian Katsu Bowls
If you’re looking to create a delicious Japanese katsu bowl without the meat, there are plenty of vegetarian options to satisfy your cravings. One popular choice is using eggplant or zucchini slices, which you can batter and fry just like traditional katsu. These vegetables absorb flavors beautifully and provide a satisfying texture.
You could also consider making a tofu katsu. Simply press and marinate firm tofu before coating it in panko breadcrumbs. It’s a best-of-both-worlds situation—crispy on the outside and soft on the inside. Top your veggie katsu with a drizzle of homemade tonkatsu sauce or a sprinkle of sesame seeds for an added flavor kick. For more ideas on plant-based recipes, check out this resource for vegetarian meals.
Different Proteins for Katsu
While the classic katsu typically features beef or chicken, don’t hesitate to mix things up with other proteins. Consider using turkey bacon instead of traditional pork, offering a smoky flavor that pairs well with the bowl’s savory elements. For a lighter touch, chicken ham can do wonders for your Japanese katsu bowls.
Feel free to experiment with seafood! Shrimp or fish fillets can be breaded and fried, resulting in a delightful twist on the classic dish. Just imagine a crispy shrimp katsu served over a bed of steamed rice, drizzled with a tangy sauce. How delicious does that sound?
Whichever protein you choose, remember that the key is to find that perfect balance of crunch and flavor, making every bite an experience worth savoring!
Cooking Tips for Japanese Katsu Bowls
Achieving the Perfect Crisp
One of the highlights of Japanese katsu bowls is that satisfying crunch when you take a bite. To achieve this, ensure your breading technique is spot on! Use panko breadcrumbs; they’re lighter and crispier than regular breadcrumbs. For the best results, double-dip your protein: first in flour, then in beaten eggs, and finally, coat it with panko. Also, maintaining the oil temperature is crucial—aim for around 350°F. This helps seal in moisture while creating that beautiful golden exterior.
Adjusting Seasonings to Your Taste
While an authentic katsu sauce is heavenly, feel free to tweak the flavors to match your palate. Start with a base of ketchup and soy sauce, but consider adding a touch of honey for sweetness or a splash of rice vinegar for acidity. It’s all about personalization! If you’re unsure where to start, check out some sauces on Serious Eats for inspiration. Experimenting will make your Japanese katsu bowls uniquely yours!
Serving Suggestions for Japanese Katsu Bowls
Creating a delicious bowl of Japanese katsu is just the beginning! To take your meal to the next level, consider these serving suggestions that perfectly complement the dish and elevate your dining experience.
Complementary Sides
Pair your katsu with sides that enhance its flavors, while adding a splash of color to your plate. Here are a few ideas:
- Steamed Rice: A classic choice, fluffy rice soaks up all the savory sauce.
- Miso Soup: A warm, comforting bowl can balance the meal beautifully.
- Pickled Vegetables: Known as tsukemono, these add a delightful crunch and zest.
For more side ideas, explore this comprehensive guide to Japanese side dishes.
Garnishes to Elevate Your Dish
Don’t underestimate the power of garnishes! A sprinkle of:
- Sesame Seeds: Adds a nutty flavor and a sophisticated touch.
- Chopped Green Onions: A fresh finish that brightens every bite.
- Cilantro Leaves: For those who enjoy a bit of herbaceousness.
These can transform your Japanese katsu bowls into a visually stunning experience. Plus, they offer delightful contrasts in taste and texture that will impress any guest!
Time Breakdown for Japanese Katsu Bowls
Creating delicious Japanese katsu bowls is a rewarding experience that doesn’t take much of your day. Here’s how you can break down the time:
Preparation Time
You’ll need about 20 minutes to gather your ingredients and get everything ready. This includes slicing your beef, coating it in panko, and preparing the accompanying rice and veggies.
Cooking Time
Cooking your katsu won’t take long! Expect around 15-20 minutes for frying, plus another 10 minutes to cook your rice.
Total Time
In total, you’re looking at roughly 45 minutes from start to finish. So, in less than an hour, you’ll have an enticing Japanese katsu bowl to enjoy! Ready to dive into the recipe? Make sure to check out more about the art of katsu over at Ness Kitchen.
Nutritional Facts for Japanese Katsu Bowls
When diving into the delicious world of Japanese katsu bowls, it’s essential to know what you’re putting on your plate. Here’s a breakdown of the nutritional elements to keep in mind:
Calories
A typical serving of Japanese katsu bowls comes in around 600-700 calories. This includes the crispy breaded beef, rice, and veggies. Depending on portions and toppings, this can vary, so adjust according to your dietary requirements.
Protein
Expect a protein punch with about 35-40 grams per bowl, making it a satisfying meal that supports muscle health and keeps you feeling full.
Sodium
Be cautious with sodium—average levels can reach 1200-1500 mg due to seasoning and sauces. For those watching their salt intake, consider using low-sodium soy sauce or homemade dressings.
For more information about healthy eating, check out the USDA’s Dietary Guidelines here. You’ll find valuable insights to better balance your meals!
With these nutritional facts in mind, you can enjoy your Japanese katsu bowls while also keeping your health goals on track. Happy cooking!
FAQs about Japanese Katsu Bowls
Can I Make Katsu Ahead of Time?
Absolutely! If you’re planning a busy week, making your Japanese Katsu Bowls ahead of time can save you a lot of hassle. Simply prepare the katsu (breaded and fried beef) and store it in an airtight container in the fridge. When you’re ready to serve, just reheat it in the oven for crispy results. Don’t forget, you can also pre-cook your rice and prep your toppings, like shredded cabbage or green onions, to have everything ready to go.
What Sauce Goes Best with Katsu?
The classic sauce that completes your Japanese Katsu Bowls is tonkatsu sauce. This rich, tangy sauce combines flavors reminiscent of barbecue sauce, soy sauce, and Worcestershire sauce, creating a perfect balance for your crispy katsu. You can find many store-bought versions, but why not try making your own at home? Just mix equal parts ketchup and Worcestershire sauce, and add a dash of soy sauce for that authentic taste.
Can I Use Gluten-Free Ingredients for Katsu?
Definitely! If you’re looking to enjoy delicious Japanese Katsu Bowls without gluten, substitute traditional breadcrumbs with gluten-free panko breadcrumbs or crushed rice crackers. For the coating, you can use a gluten-free flour blend instead of all-purpose flour. With these swaps, you won’t have to compromise on flavor or texture—it’s a win-win!
For more tips on gluten-free cooking, check out resources from Celiac Disease Foundation and explore their recipes for inspiration.
Embrace creativity and enjoy making your Japanese Katsu Bowls! If you have more questions, feel free to ask!
Conclusion on Japanese Katsu Bowls
In summary, Japanese katsu bowls are not just a meal; they’re an experience. These satisfying bowls feature crispy breaded proteins such as beef or turkey bacon, making them perfect for a cozy dinner or a meal prep favorite. The combination of flavors and textures turns a simple dish into something truly special.
Experimenting with your own toppings and sauces can personalize this beloved classic. So, next time you’re in the mood for a comforting meal, consider diving into this culinary delight. For more tips and inspiration, check out Nami’s Kitchen and Just One Cookbook for authentic recipes.
PrintJapanese Katsu Bowls: Easy Comfort Food for Your Family
Experience the deliciousness of Japanese Katsu Bowls, a comforting dish perfect for family meals, featuring crispy fried cutlets served over rice.
- Prep Time: 20 minutes
- Cook Time: 20 minutes
- Total Time: 40 minutes
- Yield: 4 servings 1x
- Category: Main Course
- Method: Frying
- Cuisine: Japanese
- Diet: Gluten-Free
Ingredients
- 2 cups cooked rice
- 4 pieces pork cutlets
- 1 cup panko breadcrumbs
- 2 eggs
- 1/2 cup all-purpose flour
- 1 cup vegetable oil
- 1/4 cup tonkatsu sauce
- 1 cup shredded cabbage
- 2 green onions, chopped
Instructions
- Prepare the rice according to the package instructions and set aside.
- Arrange three shallow bowls for flour, beaten eggs, and panko breadcrumbs.
- Dredge each pork cutlet in flour, followed by dipping in the egg, and finally coating in panko breadcrumbs.
- Heat vegetable oil in a large skillet over medium heat.
- Fry each cutlet until golden brown on both sides, about 4-5 minutes per side.
- Remove cutlets and drain on a paper towel.
- Slice cutlets and serve over rice, topped with shredded cabbage and drizzled with tonkatsu sauce.
- Garnish with chopped green onions.
Notes
- For extra flavor, marinate the pork in soy sauce for 30 minutes before breading.
- Serve with pickled ginger on the side for added zest.
Nutrition
- Serving Size: 1 bowl
- Calories: 550
- Sugar: 2g
- Sodium: 800mg
- Fat: 30g
- Saturated Fat: 5g
- Unsaturated Fat: 20g
- Trans Fat: 0g
- Carbohydrates: 60g
- Fiber: 3g
- Protein: 25g
- Cholesterol: 150mg
Keywords: Japanese Katsu Bowls