Introduction to Peppermint Swirl Cookies
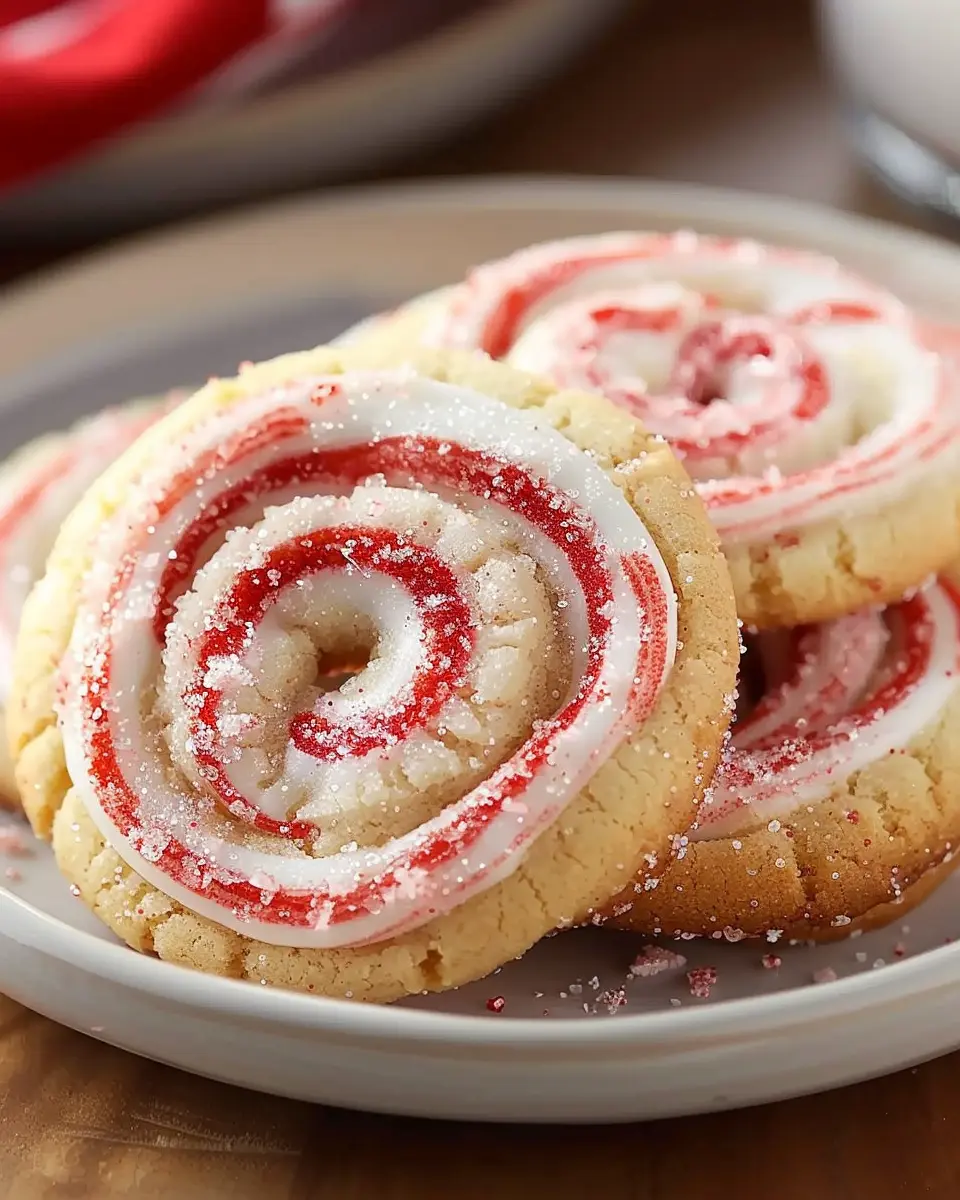
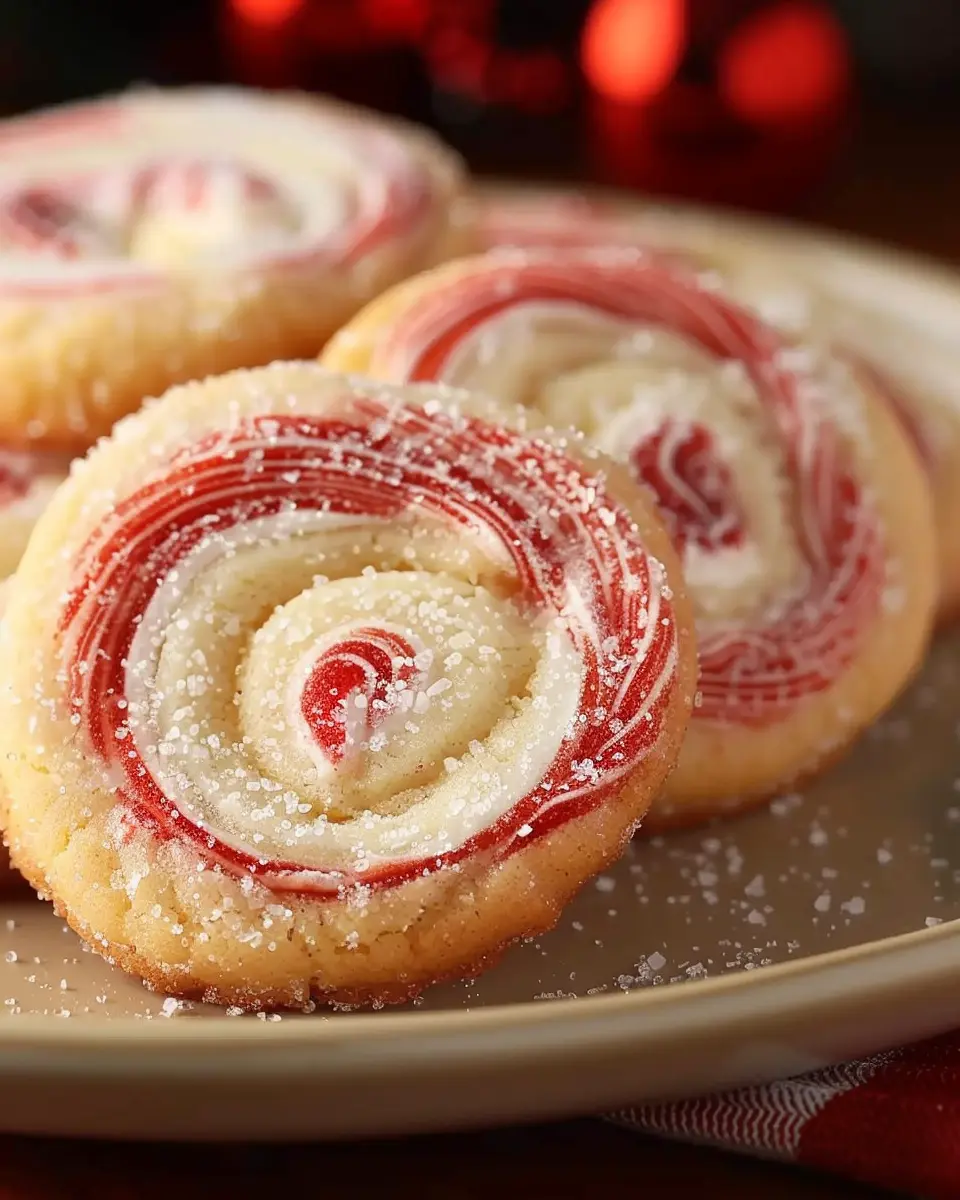
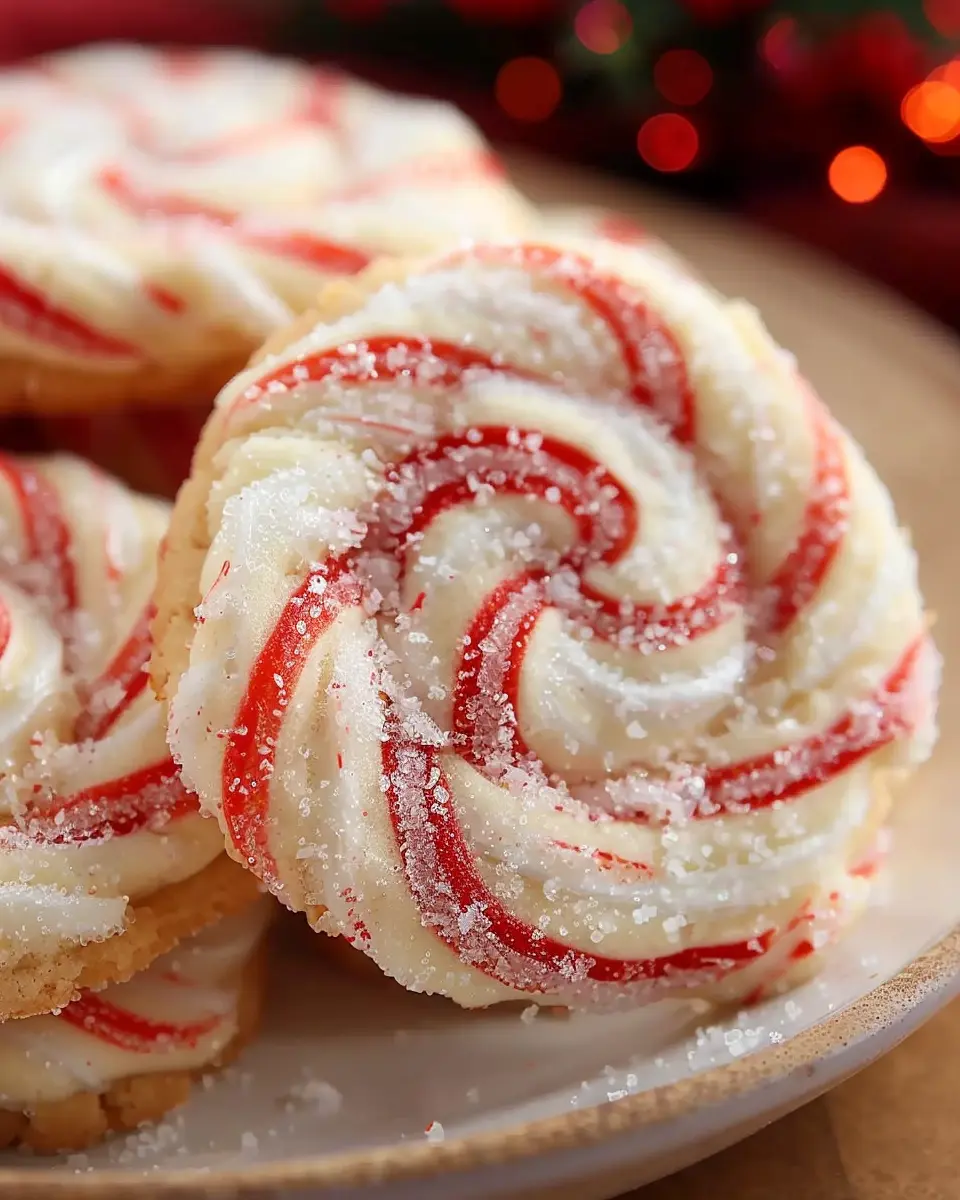
When the holiday season rolls around, few treats evoke the spirit of joy and festivity quite like Peppermint Swirl Cookies. The delightful combination of crispy edges with a soft, chewy center, accented by vibrant red and white swirls, makes these cookies a showstopper at any gathering. But really, what is it about Peppermint Swirl Cookies that turns them into an essential holiday favorite?
Why Peppermint Swirl Cookies are a Holiday Favorite
First, let’s consider the flavor! The refreshing taste of peppermint is synonymous with holiday cheer. According to a study from the American Psychological Association, certain aromas can evoke powerful emotional connections—so it’s no surprise that peppermint, often associated with cozy winter memories, sparks joy!
Moreover, the striking visual appeal of these cookies transforms even the simplest of celebrations into something special. Whether you’re hosting a festive gathering or heading to a holiday potluck, bringing along a platter of Peppermint Swirl Cookies instantly elevates your status as a gracious host. Plus, they make for a fantastic conversation starter!
Creating these cookies is not only about taste and looks—it’s about the experience. Rolling out the dough, swirling the red and white hues, and then watching them puff up beautifully in the oven is both therapeutic and exciting. You’ll find yourself relishing each step, and soon, the enticing aroma will fill your kitchen, inviting loved ones to join for a taste test.
Tips for Perfect Peppermint Swirl Cookies
To achieve bakery-perfect swirls every time, here are a few tips:
- Chill the dough: This helps the cookies maintain their shape during baking.
- Use a mix of different-sized swirls: This adds a fun, whimsical look to your cookies.
- Don’t skip the sprinkle: A light dusting of crushed peppermint candies on top adds a delightful crunch.
If you’re curious to learn more about the fascinating history of peppermint in holiday traditions, you might enjoy this article from the Smithsonian that delves into how peppermint became a holiday staple.
With a little patience and creativity, you’ll soon be delighting your friends and family with these exquisite Peppermint Swirl Cookies. Stay tuned for the complete recipe and tips to create these iconic treats right in your own kitchen!
Ingredients for Peppermint Swirl Cookies
Baking Peppermint Swirl Cookies is both an art and a science, and having the right ingredients is essential for those wonderfully vibrant swirls. Let’s break down what you’ll need.
Necessary pantry staples
Start with these basics, which you likely already have in your pantry:
- All-purpose flour: The foundation of your cookies.
- Granulated sugar and brown sugar: For the perfect blend of sweetness and moisture.
- Unsalted butter: Make sure it’s softened for easier mixing.
- Eggs: They provide structure and richness.
- Baking soda and baking powder: Key leavening agents for that lovely rise.
- Vanilla extract: Don’t skimp here; it adds depth to the flavor.
- Peppermint extract: This is where your cookies get their signature minty freshness!
Optional toppings and mix-ins
For those who love a bit of customization, consider these fun additions to your Peppermint Swirl Cookies:
- Crushed candy canes: Perfect for that festive crunch on top.
- Chocolate chips: A delightful contrast to the mint.
- White chocolate drizzle: Adds a sweet finish and elegance.
With these ingredients, you’re on your way to creating bakery-perfect Peppermint Swirl Cookies that will impress friends and family alike! If you’re looking for storage tips or serving suggestions, check out Baking Basics for more advice!
Preparing Peppermint Swirl Cookies
Baking can be a delightful experience, especially when it leads to the creation of Peppermint Swirl Cookies. With their festive colors and refreshing flavor, they’re perfect for holiday gatherings or simply when you need a sweet treat. If you’re ready to master this cookie, let’s walk through the preparation steps together.
Gather and Measure Your Ingredients
Before diving headfirst into mixing, it’s essential to gather and measure your ingredients. Here’s what you’ll need:
- Flour: All-purpose is best for structure.
- Baking powder: For that perfect rise.
- Salt: A crucial element to balance the sweetness.
- Unsalted butter: Room temperature is key for creaming.
- Granulated sugar: Sweetness meets texture.
- Brown sugar: For moisture and depth.
- Eggs: They add richness and help bind.
- Vanilla extract: Adds a comforting flavor.
- Peppermint extract: The star of the show.
- Food coloring: Red and green for that classic swirl effect.
Take your time here — measuring accurately can make or break your baking!
Mix the Dry Ingredients
In a bowl, combine your flour, baking powder, and salt. Use a whisk to ensure everything is mixed evenly; this helps with both flavor and texture. An even distribution of leavening agents means consistent results. For step-by-step guides on flour measurement, you can refer to expert baking resources like King Arthur Baking for tips.
Cream the Butter and Sugar
In another bowl, use an electric mixer to cream the unsalted butter with granulated sugar and brown sugar. Aim for a light and fluffy texture, which usually takes about 2-3 minutes. This process creates tiny air pockets that help your cookies rise beautifully.
Add the Eggs and Extracts
Next, add in your eggs one at a time, mixing well between each addition. This gradual incorporation allows for better emulsification. Then, mix in the vanilla and peppermint extracts. The aroma will begin to fill your kitchen, and you’ll understand why we love these cookies!
Form the Dough and Chill
Once combined, your dough should feel soft and pliable. Divide the dough into two equal parts. Leave one plain and dye the other red or green (or both if you’re feeling adventurous!). Wrap each portion in plastic wrap and chill in the refrigerator for about 30 minutes. Chilling helps the dough maintain its shape while baking and enhances flavors.
Roll and Layer the Dough
After chilling, it’s time for a fun part! Roll out each dough on a floured surface into rectangles. They should be about ¼ inch thick. Layer the colored dough on top of the plain dough. This is where the magic happens! Gently press down to adhere the layers together — we want those beautiful swirls.
Slice and Prepare for Baking
With your layered dough ready, carefully roll it into a log, starting from one edge. Once you have a nice tight roll, slice it into ¼-inch thick rounds. Place these slices on parchment paper-lined baking sheets to create space between them, as they’ll spread a little.
Bake the Cookies
Preheat your oven to 350°F (175°C) and bake your cookies for about 10-12 minutes or until the edges are lightly golden. Allow them to cool on the baking sheet for a few minutes before transferring to a wire rack. Watching them cool and firm up is one of life’s small joys!
Now that you’ve walked through each step to create these Peppermint Swirl Cookies, remember that the key to consistent baking is practice and patience. Experiment with your flavors, and don’t hesitate to share your results — after all, baking is always better when enjoyed together! Happy baking!
Variations on Peppermint Swirl Cookies
When it comes to Peppermint Swirl Cookies, the variations you can explore are as delightful as the festive seasons themselves. Whether you’re a chocolate lover or need a gluten-free option, there’s a twist for everyone!
Chocolate Peppermint Swirl Cookies
Why not take your Peppermint Swirl Cookies to the next level by incorporating chocolate? For chocolate peppermint swirl cookies, start by adding cocoa powder to half of your dough. Once your dough is prepared, the fun begins: layer your regular and chocolate dough, and create those beautiful swirls.
- Ingredients: Simply replace 1/4 cup of flour with 1/4 cup of unsweetened cocoa powder in half the dough.
- Tip: Swirl the dough gently to maintain defined chocolate and peppermint flavors, creating a stunning contrast and rich taste.
This combination not only satisfies your sweet tooth but also adds that lovely cocoa aroma in every bite!
Gluten-Free Peppermint Swirl Cookies
For those needing gluten-free options, Peppermint Swirl Cookies are easily adaptable! You can create scrumptious gluten-free cookies using almond flour or a store-bought gluten-free flour blend.
- Easy Substitution: Just replace all-purpose flour with a 1-to-1 gluten-free flour blend. Make sure to check the blend contains xanthan gum for texture.
- Flavor Boost: Consider adding crushed gluten-free peppermint candies for that extra crunch and flavor boost.
By experimenting with these variations, you’re sure to find a new favorite. After all, it’s all about enjoying what you bake and sharing it with friends over a hot cup of cocoa! For more insights on baking variations, check out resources like King Arthur Baking. Happy baking!
Baking Tips for Peppermint Swirl Cookies
Ensure freshness with proper storage
Storing your Peppermint Swirl Cookies correctly can make all the difference in maintaining their delicious flavor and soft texture. After baking, let them cool completely on a wire rack. Then, place the cookies in an airtight container lined with parchment paper. This not only keeps them fresh for up to a week, but it also prevents sticking. If you want to enjoy them longer, consider freezing them! Just stack the cookies with parchment paper between layers and seal them in a freezer bag. They can last up to three months in the freezer.
Tips for a perfect swirl
Achieving those beautiful swirls in your Peppermint Swirl Cookies is all about technique:
- Chill the dough: After mixing, chilling your dough for at least 30 minutes will make it easier to handle and will help maintain those defined swirls.
- Use a gentle hand: When swirling, use a skewer or a knife, and don’t overmix. Just a few gentle swirls should do the trick!
Want more tips? Check out America’s Test Kitchen for expert advice on achieving the best cookie results!
Serving suggestions for Peppermint Swirl Cookies
Pairing with festive beverages
When it comes to enjoying Peppermint Swirl Cookies, think beyond traditional coffee. Picture these delightful cookies alongside a steaming cup of hot chocolate, where the chocolate’s richness perfectly complements the coolness of the peppermint. You can also serve them with peppermint tea for a more layered peppermint experience or a vanilla latte to balance the flavors. If you’re hosting a gathering, consider setting up a cozy beverage bar featuring these drinks, inviting guests to create their perfect pairings.
Presentation ideas for holiday gatherings
The visual appeal of your Peppermint Swirl Cookies can elevate your holiday gatherings. Try arranging them on a decorative platter adorned with red and white accents to echo their festive colors. For an added touch, sprinkle crushed peppermint candies around the cookies or place them in festive bakery boxes tied with ribbons. Don’t forget to share the recipe card for these delectable treats, as your guests will likely want to recreate the magic at home. For more ideas on cookie presentations, you can explore detailed guides on websites like Martha Stewart or Food Network.
Time breakdown for Peppermint Swirl Cookies
Preparation time
Making Peppermint Swirl Cookies is a breeze! You’ll need about 25 minutes to gather your ingredients, mix the dough, and create those delightful swirls. This is the perfect time to listen to your favorite tunes or chat with a friend while you’re at it!
Baking time
Once your dough is ready, pop those cookies into the oven for about 10-12 minutes. As they bake, your kitchen will fill with that irresistible peppermint aroma. It’s the anticipation that makes them even sweeter!
Total time
All in all, expect to spend around 40 minutes from start to finish. That’s just enough time for a quick coffee break or even a few minutes of relaxation before indulging in your beautifully swirled Peppermint Swirl Cookies. Don’t forget to share them with friends or pack them up for an office treat! Want to dive deeper into the baking world? Check out Baker’s Journal for essential baking tips.
Nutritional Facts for Peppermint Swirl Cookies
Understanding the nutritional content of your favorite treats can help you make informed choices. Here’s a quick overview of the facts for Peppermint Swirl Cookies:
Calories
A typical serving of these delightful cookies packs around 120-150 calories. It’s a sweet indulgence you can savor without too much guilt.
Sugar Content
These cookies typically contain 10-12 grams of sugar per serving, primarily from the sugar used in the dough and the peppermint candies on top.
Tips for Reducing Sugar
- Use a sugar substitute: Consider alternatives like stevia or monk fruit sweeteners.
- Cut back on added sugars: You can reduce the overall sugar by 25% without sacrificing flavor.
- Opt for dark chocolate: If you’re adding chocolate, dark chocolate has less sugar than milk chocolate.
By being mindful of ingredients, you can enjoy your Peppermint Swirl Cookies guilt-free. For more tips on balancing treats and nutrition, check out Healthline.
FAQs about Peppermint Swirl Cookies
Can I use different colors for the swirls?
Absolutely! One of the best things about peppermint swirl cookies is their versatility. You can create a dazzling array of colors for the swirls. Consider using vibrant gel food coloring for richer hues. Don’t hesitate to experiment—red, green, or even shades of blue can add a unique touch to your festive baking. Just remember, the dough should remain balanced, so adjust the colors gradually until you achieve your desired effect. If you want to check out color theory for baking, this guide might be helpful.
What is the best way to store these cookies?
To keep your peppermint swirl cookies fresh and delicious, store them in an airtight container at room temperature. They’re best consumed within a week, but if you want to prolong their life, refrigerate them for up to two weeks. Just be sure to separate layers with parchment paper to prevent sticking. If you’d like to enjoy them later, freezing is an excellent option! Wrap each cookie individually, then place them in a freezer-safe bag. You can thaw them at room temperature before indulging.
How can I make them more festive?
Making peppermint swirl cookies extra festive can be easy and fun! Consider adding toppings like crushed candy canes or colorful sprinkles right before baking. You could also drizzle melted chocolate over cooled cookies for a decadent twist. Want to take it a step further? Packaging them in cute holiday-themed boxes or tins can add a thoughtful touch when gifting to friends or family! This article on festive cookie decorating ideas may inspire you further.
With these tips, you’ll be well on your way to creating the most delightful peppermint swirl cookies perfect for any occasion!
Conclusion on Peppermint Swirl Cookies
Embrace the holiday spirit with delicious cookies!
As the holidays approach, there’s no better way to spread joy than with Peppermint Swirl Cookies. Their vibrant colors and delightful flavors encapsulate the very essence of the season. Baking these cookies is not just about satisfying your sweet tooth; it’s a delightful activity that brings friends and family together.
Think about it—who doesn’t love the festive feel of pulling a tray of freshly baked cookies from the oven? Not only will your home smell incredible, but you’ll also create delicious memories to share. So grab your ingredients, channel your inner pastry chef, and let those swirls shine. Happy baking!
For more baking inspiration, check out resources from the American Baking Guild or explore additional cookie recipes on Allrecipes.
PrintPeppermint Swirl Cookies: Bake Perfect, Indulgent Swirls Every Time
These Peppermint Swirl Cookies will impress your taste buds with their beautiful swirls and delicious flavor. Perfect for any occasion!
- Prep Time: 20 minutes
- Cook Time: 12 minutes
- Total Time: 1 hour 32 minutes
- Yield: 24 cookies 1x
- Category: Desserts
- Method: Baking
- Cuisine: American
- Diet: Vegetarian
Ingredients
- 2 cups all-purpose flour
- 1 cup unsalted butter, softened
- 1 cup granulated sugar
- 1 large egg
- 1 teaspoon vanilla extract
- 1 teaspoon peppermint extract
- 1/2 teaspoon baking powder
- 1/4 teaspoon salt
- 1/4 cup red gel food coloring
- 1/2 cup crushed peppermint candies
Instructions
- Preheat the oven to 350°F (175°C).
- In a bowl, cream together the butter and sugar until light and fluffy.
- Add the egg, vanilla extract, and peppermint extract, mixing well.
- In another bowl, whisk together the flour, baking powder, and salt.
- Gradually add the dry ingredients to the wet mixture until just combined.
- Divide the dough in half; tint one half with red gel food coloring.
- Roll out both doughs between parchment paper to 1/4-inch thickness.
- Layer the red dough over the plain dough, then roll them together into a log.
- Wrap the log in plastic wrap and refrigerate for at least an hour.
- Slice the chilled dough into 1/4-inch thick cookies and place on baking sheets.
- Bake for 10-12 minutes or until lightly golden.
- Let cool on the baking sheets for a few minutes before transferring to a wire rack.
Notes
- For a festive touch, drizzle melted chocolate over the cooled cookies.
- Chilling the dough helps maintain the shape of the cookies while baking.
Nutrition
- Serving Size: 1 cookie
- Calories: 120
- Sugar: 10g
- Sodium: 50mg
- Fat: 7g
- Saturated Fat: 4g
- Unsaturated Fat: 2g
- Trans Fat: 0g
- Carbohydrates: 15g
- Fiber: 0g
- Protein: 1g
- Cholesterol: 20mg
Keywords: Peppermint Swirl Cookies, Cookies, Baking, Holiday Treats, Festive Desserts